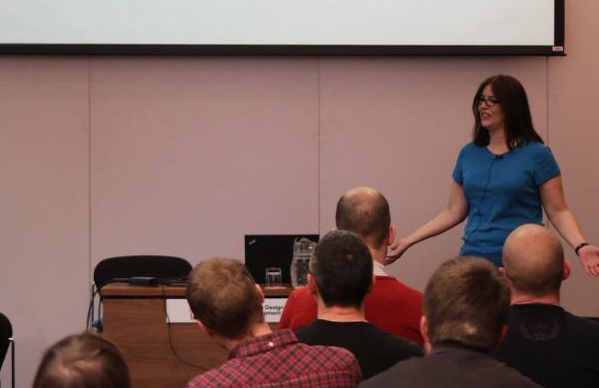
Get started as an independent consultant in software development.

Many software developers at one point in their career may wish to go out on their own and start their own software development business. Some do, but the majority usually stays employed for various reasons, including not knowing where to start and how to proceed. In this post, we’ll look at some of the steps necessary to start your own software consultancy. From there, you can choose what path you want to take.

I’ve spent nearly 20 years of a 30+ year career in software development as an independent consultant. What’s in this blog post is what I’ve learned that has worked for me, or other consultants who I have worked with.  

Getting started

You’re ready to hit the ground running and start making megabucks as a consultant. But how do you get started? It’s a bit more than going out and buying some business cards then yelling “I’m open for business!”[1]. There are some things you’ll need to do to make success more likely. First, some “housekeeping”, which is to say, all of that not-so-fun stuff that goes into consulting. Some of this advice here in the “Getting started” section largely applies to folks residing in the USA. Other countries may have different requirements regarding taxes or laws about opening a business.

Make a business plan

Just like at a company, if you don’t make a plan with goals, you don’t know if you’re actually accomplishing what you set out to do. Your plan may be to reach a certain amount of revenue or clients, or perhaps to secure work in a certain specialization. If you plan on incorporating, getting lines of credit, or taking out loans for any reason, you may be required to provide a business plan.

Get an attorney

Get yourself an attorney that specializes in small businesses and sole proprietors. You don’t have to spend a great deal of money, but you should have someone available to field questions, double check documents and contracts, and generally help you on the legal side of things. 

Depending on the type of work you’ll be doing, your lawyer can help you create templates for SOWs (Statement of Work) and other legal documents you’ll need when dealing with clients. Absolutely do not engage with clients without a SOW and a contract. Legal documents such as contracts are there to benefit both parties and clearly define the scope and type of work so there is no confusion. If you’ve only worked for an employer before, you might not have dealt with contracts and statements of work. Your lawyer can show you how it all works and guide you through it.

Get an accountant

If you already have one you like, great! You can probably just continue using her. Taxes can become complex quickly so it’s best to go with a professional. There will be expenses you could deduct as well as other accounting practices you simply won’t know about unless you’re an actual accountant. It’s foolish to spend billable hours on something like filing and paying taxes, when you can be out there billing. 

Start your business

How you proceed here largely depends on where you live. In the USA, you can go as a sole proprietor, LLC, or S-Corp. The type of business you choose affects how you pay taxes and run your business. Your accountant will help you make the choice based on your goals in your business plan. This choice not only affects how you pay and file taxes, but also which clients you may work with. Some large corporations will only work with an LLC or S-Corp, and not a sole proprietor.

Everyday activities

You’ll have expenses, so you’ll need to open a small business bank account. Keep your own money and the money you designate for your business separate, even if you register as a sole proprietor. It’s easier to organize expenses and taxes when accounts are separate. It’s also easier to prove to the tax authorities that you’re paying taxes correctly. 

If you will travel for your business, get a credit card specifically for the business. Use this card for office expenses, marketing expenses, or any business (again, not personal) expenses. Keep receipts to match your bank statements and ask your accountant what is tax deductible. Don’t assume and you use your business credit card to pay for it. Ask first. Tax law changes yearly so what is deductible this year might not be next year. 

Insurance

Get yourself liability insurance at a minimum. Some large corporations require it. If you like your current auto or home insurer, see what they have for self-employed folks.

Taxes

This absolutely varies from country to country. In the USA, companies deduct taxes from paychecks for folks who are employed part or full-time. This includes an unemployment insurance tax that now comes out of your own pocket. Once you run your own business you must do all the tax administration yourself. Your accountant should guide you and get you the forms to pay taxes either quarterly (most common) or yearly, as well as an estimate of how much you might pay. Just be sure to pay on time to avoid late fees.

Getting clients 

Marketing and sales

Whether you like it or not, you must market and sell yourself. If you plan on taking on employees at some point, you must sell your company’s services. Invest the time to take at least an intro course on sales/marketing, or do some deep reading on it. As an independent contractor you’ll now have what sales people call a “pipeline” and you need to keep it filled so there are as few gaps in work as possible. 

Most tech people hope to avoid any sort of marketing and sales activity but this is a huge mistake. It doesn’t matter if you are a full time employee or an independent consultant. Employees must market themselves for raises and promotions while consultants do it to land the next gig. Both do it to become recognized as a highly competent professional, and possibly an expert. Your work only speaks for itself after someone else knows about it.

The best way to get clients is through word of mouth. Word of mouth is the most personal way to market yourself or a product. This is because you’ve built up enough trust that someone else will vouch for your expertise or product’s quality. So call upon your professional colleagues who you’ve worked with in the past to see if there are any contracts in your area of specialization. Check in with colleagues of previous employers to see if there’s any contract work at those places.

Social networking

Here’s another to file under “like it or not, you must do this”. It’s social networking. Everybody wants to see some sort of online presence before they are willing to pay for a product or services. Publish a website with at least some information about you and your specialization. You might want to combine it with a blog (more on that below). Twitter and LinkedIn are popular online spots for people to research companies and individuals, and highly recommended for visibility. Both are also easy ways to communicate with potential customers via direct messages.

Public speaking

Public speaking is a great way to showcase your skills as well as tell the world that you are out and available to take on business! Speak about the area of expertise that you want to work in. Start at user groups and meetups, then submit to other conferences as well. Nowadays, there are many options for speaking virtually as well, which often leave a nice recording you can use to promote yourself. Pro tip: Don’t forget to actually tell people that you’re accepting clients during a talk. If the audience doesn’t know, they won’t approach you for work.

Blogging

Blogging is similar to speaking, but to state the obvious – it’s just written down instead. The nice thing about blogging is that you can make a post about a topic, particularly if it solves a problem, then hand it out as a “free sample”, so to speak. This works out great when others need help overcoming that same problem. You can point them in the right direction, then follow up with your newly learned sales and marketing skills to land the gig solving this problem. Blogging is a great way to show off your expertise as well as communication and writing skills. 

Open-source 

Participate in an OSS project or start your own. If you have written a utility that proves useful in different scenarios then consider making it OSS and charging for support by the incident or better yet, through an SLA (Service Level Agreement) with various pricing tiers. Your attorney can help you create an SLA.

Networking

If you have the budget then consider sponsoring software development events. This can be in the form of an actual sponsorship or simply buying branded swag (pens, stickers, etc…) and passing it out with business cards while you’re networking.

You are networking, right? This is imperative. If you do not have established professional relationships, the whole “word of mouth” thing goes out the window. If you want to be successful, you must curate professional relationships regardless of whether you are consulting or a full time employee. 

How to set consulting rates

There are several things to consider when setting your rate to ensure you aren’t charging too little or too much. The goal is to bring in more money than you spend. However, as a self-employed person, you must pay for your own health insurance, liability insurance, unemployment taxes, and other expenses such as office supplies and travel expenses. All of this goes into the cost of doing business. (Often abbreviated as COGS, Cost of Goods Sold. You are the goods.) You are no longer paid for vacation, sick days, or holidays. A good estimate is to reduce your overall billable time in weeks from 52 weeks to roughly 40. 

You will often have down time in between projects. Of course, the optimum situation is to keep your project pipeline flowing so that one job stops just when you’re starting the next (see Marketing and sales). But this doesn’t always happen, and as an independent contractor, you must account for this yourself. In large consulting shops, it’s called being “on the bench”.

When you’re on the bench, it’s a great time for keeping up with new technologies or learning new things. You are now the employer to yourself, so you’ll be eating the cost of training materials as well as giving up billable time to learn. However, don’t count on being able to learn on the job. Consultants are expected to know what they’re doing before they start new projects.

It can cost a lot of money to be a small business or self-employed. Make sure your rates cover it, including bench time, while also providing for you to live.

Final Thoughts

Financial security

What happens if you don’t get clients and go for a few months without work? The common suggestion is to save approximately 3 months worth of living expenses for those times where you might not be working. The stress of not being able to pay bills makes it a lot harder to also run a business well. Since you no longer have a steady income you must learn to live with variable income. Making sure you have some money held for such occasions eases this burden.

For extra financial security, consider creating a source of backup income through investments or passive income streams. If investing, check with a financial advisor. For passive income streams, YouTube, Tiktok, and Udemy are popular platforms. Of course, you must invest some up-front time for this, so you might want to do it after hours while you’re still employed to get a good start. These won’t return megabucks right away, if at all. But they will supplement a small portion of your income (about 1-5%). Weigh the time against what you reasonably think you’ll get in return.

Consultant’s mindset

Get into the “consultant’s mindset”. There’s going to be a lot of time that you must spend on the boring details of taxes, scheduling, paying bills, finding work, and everything but working on the cool stuff you prefer to work on. So make sure you track not just working hours but other hours so that you know exactly how many hours you’re spending on non-revenue generating tasks. This will also help you adjust your billable rates. Once something becomes too time consuming or burdensome, you can then justify the expense of hiring someone else to do those things (e.g., a sales person, office assistant, bookkeeper, etc…). Being an independent consultant is a constant balance of your billable vs non-billable hours.

[1] I know someone who did this. He simply bought business cards and set up a landline (early 2000’s). He expected that “If you build it, they will come.” It didn’t work then. It won’t work now.

Resources for learning .NET | A .NET Learning Path

For those who are new to .NET, this is a quick guide to get started to becoming a .NET developer and start you heading in the right direction. Of course, you’ll want to dive deeper into many of the topics in this post. 

Where to start

It can be daunting just looking at all the technologies and languages that are out there to dig into. For those who want to code in .NET, a good place to start is by learning about the software in the .NET family. This will give you information on what is available and why you might want to use it (see “more links” below). 

Next up: pick a language: C#, F#, or Visual Basic. Once you’ve got a grip on the language, focus on one or more areas of development specialty: backend, web, desktop, cloud, or mobile. A common path is something similar to this: language-> speciality (e.g., UI or backend) -> adjacent technologies (e.g., Azure, DevOps, Product Management). You will likely need to know some of the surrounding technologies to varying degrees. So you’ll need to learn them concurrently while learning your chosen language. As this happens, you may find that you enjoy specializing in one or more areas.

Consider what kind of products you want to build, or what you want to do with a programming language. Do you want to build web or mobile apps, or focus on mega-computing in the cloud? Remember, you’re not marrying these choices, it’s common to move around and work in one area then another.

Choose one (or more) from each row in the following graphic:

You might run into confusion about some of .NET’s naming, for example, .NET Framework vs .NET (also called .NET Core). .NET’s history reveals why, but the gist of it is that .NET Framework is the original .NET from the early 2000’s. What’s called .NET now was .NET Core when it was released in 2014. .NET (Core) is a more modern version of the .NET Framework. There is some overlap between the two as well as some incompatibilities. So unless you have a specific reason to start with .NET Framework, go with .NET (sometimes referred to as .NET Core). 

More links:

Learn a .NET language

.NET Supports multiple languages, including C#, F#, and Visual basic. C# is the most popular and most samples and learning material online are in C#. However, Visual Basic has roots that go back before .NET, and there are some high-paying career options available for developers who can work on legacy VB systems. Both C# and VB are object-oriented programming languages that can be adapted to a variety of computing scenarios. F# is a functional programming language and is a good niche to work in solving interesting problems, particularly in finance, data analysis, or scientific endeavors. 

While working and learning in .NET, you’ll find that understanding general principles of programming, building digital products, software development, and the like will help you become a better .NET developer. Additionally, knowing programming concepts such as Object-Oriented Programming (OOP), since C# and VB are OOP languages. Some helpful resources that apply to .programming but aren’t part of .NET are as follows:

A great way to learn to code is by reading code just as much as writing code. Comb through some OSS projects at the .NET Foundation and try to read the code from popular projects. You may even want to contribute to some yourself if you can. 

More links:

Specializations and .NET Adjacent Technologies

There are many other technologies that work with .NET that you should familiarize yourself with. Knowing database design basics is a great skill if you write enterprise software. UX design, product management, Agile  & Scrum. Many .NET full stack developers use JavaScript libraries for the user interfaces such as Vue, React, or Knockout. Full stack and web developers need familiarity, if not proficiency, with HTML, CSS, and JavaScript

Building software takes more than writing code. Software must be compiled, assembled, and shipped in whole or part. It must be tested to verify it works and works with other software. Some developers move into DevOps and work with Docker, Kubernetes or other container technologies to assist in building, shipping, and managing software. And of course – someone has to manage the developers and product. Some developers move into product design or management.

A really important tech for programmers is the cloud, so consider Azure or AWS as a viable backend for .NET software, as well as software written in other languages.

As you learn to write code, get yourself setup with a GitHub account and learn the basics of Git and GitHub if you haven’t already. GitHub & Git aren’t programming languages, but rather tools for managing your code called Version Control Software. Every programmer needs some type of VCS regardless of the languages they write in. GitHub is the most popular, and is a great way to showcase your portfolio so you can land that job!

Resources

This is in no way a comprehensive list, but rather a nice place of mostly free resources to start. There are hundreds of free or inexpensive courses on Udemy. The ones here show ones that are popular with high ratings, but do explore their course catalog and choose which works best for you. Pluralsight and LinkedIn Learning are also popular video learning platforms for .NET. 

I write a .NET newsletter filled with tutorials, tips, tricks, and fun stuff:

Books, magazines, and book subscriptions (some free, some not):

YouTube/Streaming Channels:

Get yourself hooked into the .NET ecosystem by joining Twitter and searching for folks tweeting under the following hashtags. Don’t forget to check out other popular programming related hashtags you see while looking for these.

Dotnet, c#, .NET, .NET Core, Programming, Software Development

Find and follow people on Twitter and connect on LinkedIn with those who are working as developers and  Developer Advocates. Developer Advocates (aka Avocados 🥑), are in the people at various tech companies who help and mentor and teach others in the tech industry. They’ll help you succeed

Join LinkedIn and connect with those in the industry. Don’t be afraid to post to people who know you’re new and are looking for guidance. Most folks are happy to connect with newcomers and provide some programming or career advice.

In the meantime, if you don’t have one, get yourself a mentor. A mentor gives guidance and answers questions about the topic agreed upon. It could be general career advice as well as technical advice. 

Consider taking software development classes at a college if possible. Online or in-person, it doesn’t matter. Classrooms give structured direction with a knowledgeable person who is often an expert (as always there are exceptions). Unfortunately for many, formal classes are cost prohibitive. However, many great universities now offer free software development classes online. 

Conclusion

Showing up is half the battle. And now you’ve got enough goods to get started, so get out there and do it! In addition to what’s here, Use Google, YouTube, and Bing to search for books, courses, blogs, videos and other learning materials. Twitter is an excellent place to ask questions and get a variety of responses from around the world. And keep in mind, you won’t learn all there is to know from visiting the links in this single blog post. You must make a concerted effort and frequently practice to become a competent software developer (i.e., reading and writing code) even more than you need to watch videos or read books.

Career advice for novice software developers, IT pros, and tech workers

I’ve compiled a list of advice from seniors in the tech industry ranging from general career advice, to job hunting and interviewing, and specializations.

About the job hunt

“Don’t be seduced by the candy cart. They roll that sucker out Friday afternoon to keep you working late.
If you can find the company that does something you believe in, the paycheck won’t matter as much but don’t kid yourself, you still have bills to pay. Don’t let any company use nice views and a low cost of living as justification for paying substandard salaries.”

“Don’t be afraid to ask them what it was about your resume or public profile that attracted them. And when they tell you it’s all the speaking and writing and volunteer work you did, be sure to ask them if you’ll still be able to do that when you’re working for them. I’ve seen a number of companies who hire people like that and then turn around and tell them they don’t want them doing that anymore.”
-Chris Williams

“Random thought: Interview the company. You need to get as much information/intel on them as they want to get on you. Ask them about their practices, their work environment, expectations, etc. If you get vague responses or responses bordering on sounding annoyed, run.”
Jason Bock

“Even if you are desperate for a job in the field, don’t just sign an employer agreement. Actually read it. Be aware that “employer agreements” may contain weird requests like “list your inventions” (which NDAs at other companies may prevent and it isn’t their business anyhow), “EVERYTHING you create – include stuff on your own time – is ours”, and other shadiness. If you don’t agree with it, challenge it, have the important conversations, and don’t sign it unless you absolutely agree with it.”
Sarah Dutkiewicz

“Oh, and one would think this doesn’t need to be said, but for early 20-something dudes, it probably does: leave the bro culture at home. Companies, especially large companies, are working harder than ever to be inclusive. Things in your online profile which are not, or things you say in an interview which are not, could hurt your chances to be on a team.”
Pete Brown

“To get the job: practice a lot, on a whiteboard, for months before the interviews.
To get better: read and write a lot of code, GitHub is a good place for that.
To remain sane: have your own pet project that you do just for yourself. This also helps getting better.”
Bertrand LeRoy

“You know who else shows up at User Groups and Code Camps? Recruiters and hiring managers. And don’t be afraid to introduce yourself as a developer looking for work when the leader goes around the room.”
-John Dunagan

“Never believe the “job requirements” when applying. What they post is their WISH LIST, not what they actually expect to get – so if they ask for 3-5 years, apply anyway even with 0 years. If you interview well, and are (kind of by definition) a lot cheaper than someone else, you may well get hired.”
Rocky Lhotka

“1. remember that a job interview is a two-way street. You ARE ALSO interviewing the company.
2. If a future team member is being a jerk while interviewing you, chances are he will continue to be a jerk after you take the job.
3. If you are part of an underrepresented group it is your responbility to send the elevator back down once you make it.
4. If after 3-4 rounds of interviews the company still has not made a decison and is making you wait an unreasonable amout of time, it’s time to move on. If I company really wants you, they should know within 2 weeks.
5. A company’s hiring process tells you a lot about what kind of company it is.”
Jose Luis Manners

Go to every interview you can, you must practice interviewing. Watch interviews online, practice with friends, and in real interviews. Ask for feedback from every interview you do and keep a notebook of parts you think went well and parts that didn’t.

Build a profile on LinkedIn, and create a blog. Use the blog as a journal of important skills you are learning.
-Rachel Appel

General Career Advice

“Google/Bing yourself from an inprivate/incognito session and see what comes up. Do it in various ways, like including your school name etc.

Many don’t realize how quickly the results can move your resume up or down in the pile. Also, just because high school seems like a million years ago to a college graduate doesn’t mean a potential employer will see it that way. Stuff you do online sticks with you.”
Pete Brown

“Whatever you do, own it, and do a fantastic job. It doesn’t matter if you’ve been asked to clean the teaspoons in the kitchen, sweep the floor, whatever, as part of your role at the bottom of the ladder.”
Jen Stirrup

“First of all – the absolute best advice I can share is to be part of the revenue stream. If you are in IT at a hospital or bank or retailer it’s surely important… but most will unfortunately still see you as a cost center – and you’ll usually be treated as such. My advice is to be in a role in a part of the org that either builds or sells the product or service that brings in the money.

The second piece of advice would be to always stay true to yourself… try to be in a role that you really enjoy – even if it’s not the tops in pay. We only live once, don’t spend too many days doing crap you hate.

Last piece of advice… be honest and humble. There’s always someone who is smarter than you. You can’t fake it all the time and people HATE liars.
Go Eagles! 
-Bill Zentmayer, manager at Microsoft

“At the beginning of your career, or even at the beginning of most new jobs, you are going to be completely useless, and that’s OK. It’s your job to learn as much as you can, and over time, you will become more useful. If a boss or a company doesn’t understand that, then that’s the wrong boss or company for you in the early stages of your career.”
-Charles Graham, Software developer

Find mentors. I recommend that young men have some women as mentors and that young women have some men as mentors. Find someone who is different than you, so that you can widen your perspective
-Rachel Appel

Sharpen those tech Skills

“Obsess about something that will make you stand out. Anytime I needed to master anything, it took dedication. So pick something relevant but something you love as well. In my history, it’s been drawing, 3D animation, photography, assembler programming, open source, CQRS/ES, #git. Each time you do this, you will generate a piece of a very strong foundation that can hold up, others, teams, organisations or entire communities. Doing that for #git gave me one of 2 gold version control badges on stack overflow.”
Adam Dymitruk

“Know your stack. know your design patterns, in general and for said stack(s). don’t sweat code syntax — know and speak to common industry design scenarios, popular libraries, and solutions that play to established (and emerging) architectures.”
-Doug Erickson, manager at Microsoft

More than tech skills

“Be human. Learn to communicate over coffee, etc. Build human relationships. Technology changes all the time but basic people skills (eye contact during a conversation, manners) are always “in vogue””
Brian Randell

“Learn to speak in public and write well. The people who advance don’t just have good ideas they share them. A lot of people think that tech careers are all about the tech stuff. The tech stuff is very important but you can stay in low level jobs forever if you can’t communicate. Most people are afraid to make public presentations – get over that fear and it will be a huge help to your career.”
Alfred Thompson

“For my preferences as a hiring manager of many years, i look for signs of: do you take on relevant challenges and see them through to completion? are you collaborative — do you have testimonials that use words like “helpful”, “respectful”, etc? i’m not looking for “drive” or “leader” (which are typically exclusionary words) as Iiam for a strong ethic around contribution and delivery, and a style that really enables others as well as elevating you.”
-Doug Erickson

“People skills are a must. Invest time in building people skills. Getting involved in tech meetups is a good way to do this.”
-Rachel Appel

Careers in the tech industry

“Go to networking groups like the Philly Tech Meetup and other groups that might have topics you are interested in. Find a mentor and a good recruiter as well”
-Tim Dodd

“What school you attend may help you get some interviews. But generally only your first job. After that you need to show accomplishments. If you are not at a big name school you will want to do some side projects – something impressive that you can share on your resume and at interviews.”
Alfred Thompson

“Do not neglect the power of community and networking with people. Since I started as an IT professional in 1998 – I got my first IT job “on my own”. Everything else has been through word of mouth, talking with people and being involved in the community.”
Lou Vega

“I believe it is important to realize that software development is not just about the cool technology, but rather is something that involves many “soft” (which for some of us are very hard) skills.
Over the 45+ years I have been in the game, things evolved. My initial interest was largely fueled by a desire to get away from people, and a machine that did exactly what I said fit the bill. For the first decade or so, programming was a back room skill, and I could disappear for weeks (occasionally months) into it. Then they invented users….
The technology I work with today is completely different than what I started with. Dave Noderer is 100% correct that it will be a lifelong learning experience that takes significant time.
But the technology is really secondary to the people, ranging from others on the team, to those responsible for defining the goal, to those who will interact with the resultant software.
If anyone is left reading this, and still considering such a career, then Welcome Aboard, you are in for the ride of your life. Speaking for myself, I could not imagine it being any other way.”
-David Corbin, Independent Consultant and MS MVP

“1. Question everything. When you get a “requirement” from a user, ask yourself if you really understand every bit of it (this also applies in interviews). Work out what assumptions you are making and ask for clarifications in this.

2. Be prepared to read outside your field. Unless you work for a few select companies, you’re generally going to be building solutions in areas that you have no prior experience in. If you want to be good at what you do and actually provide something that is of use to clients, one of the most important abilities you will pick up is the ability to learn new industries/jobs very quickly.”
Peter O’Hanlon, software developer

“The tech industry has specialties of expertise and sub-fields added to it constantly. When I started there were no Data Scientists, AI, or Machine Learning fields. Everything evolves, and rather quickly.
Look around for sub fields of interest and choose a specialty you think fits you well. Learn everything you can about it. A college degree is neither necessary nor important to many employers, if you know the core concepts about computing and can learn efficiently and quickly.

Regardless of your specialty, you absolutely need to learn a programming language. As already recommended, a scripting and compiled language is optimal. Learn hardware and networking basics as well.”
-Rachel Appel

On Learning

“Learn a modern language (whether it’s Powershell, Python, Java, C#, etc.) really well. Once you know the fundamentals of programing, and you know one language really well, the rest is just syntax if you need to do something with another language.”
Lou Vega

“Share. Don’t hoard your knowledge in the mistaken belief it makes you more valuable. Share it with your colleagues and listen to what they share with you.
Never stop learning, not just in your field. Every technology dies. Don’t risk being an expert in a dead-end field.”
-Bob Simms, IT industry trainer

“Watch and learn what the others do while you do that activity. If you can’t do that activity properly, and with care, you’ll never be asked to do anything else. So smile and get on with it. If you can’t do the small things, you won’t get the chance to show you can be trusted with the big things”
Jen Stirrup

“Never stop learning. I have learned a new programming language about once every three years for the last 45. I’m falling behind. Don’t fall behind.”
Alfred Thompson

“Listen and learn. If you’re in the early years of your career, there’s a lot to learn, no matter how high your grades were in school. And continuing learning for the rest of your career. Don’t go into an entry-level interview assuming the company is in shambles and is looking at you to save the day. You’re entry level, and you’re going to be working with people with years more experience than you.”
Jeff Cogswell, software developer

Lifelong learning and continuously poking at new areas is really important.
-Dave Noderer, MS MVP, South Fla Code Camp

Learning doesn’t stop when you get a diploma or degree. In the IT field, you either learn new subjects continuously or become obsolete quickly.
-Rachel Appel

The most given advice:

-Learn at least one or two programming languages in depth
-Be humble
Never stop learning.

Website & App Accessibility for the Visually Impaired

The internet is an important and mandatory part of modern life, including the 285 people million worldwide who have some form of visual impairment (1.4 billion web users worldwide have accessible needs). However, those with visual impairments are often unable to use much of the internet as many sites demand that lack features necessary for low or no vision users. The lack of sight isn’t the only issue as approximately 8% of the male population experiences one of the three forms of color blindness. Visually impaired users comprise of a large segment of the population, usually around 10%. It’s important to provide an accessible site so that you can reach all your customers without inadvertently adding challenges for some. Additionally, there are laws that US government websites as well as websites at some companies or sectors must adhere to defined by http://www.section508.gov/. Before jumping into the technical aspects of accessibility, let’s look at how visually impaired users “see” your web pages.

How the Visually Impaired Use the Internet

The internet is largely visual, and that can exclude people who have visual impairments from accessing its contents. Low vision users often require the use of assistive technology, usually in the form of a screen reader. While most people need to increase the browser’s font size frequently, those with severe impairments must use a screen reader such as JAWS, NVDA, Window Eyes, or one of the many others. If you’ve never used a screen reader, you can watch this video about how a blind student uses the internet that should give you a sense of what it’s like. Screen readers are quite robust in their capabilities, but they do have limitations, and cannot completely substitute for the visual experience, especially in a graphic laden site. That’s because screen readers cannot read videos or image data, only textual data and DOM elements. Additionally, low vision and blind users rely heavily on using the keyboard, since a mouse demands high fidelity eyes as well as hands to work. That means non-mousers use Tab/Shift keyboard combination in a Windows system to move between heading level tags, named anchors, and form elements, sometimes while waiting for the reader to catch up. This is the opposite of a sighted person who’s eyes can quickly scan away from redundant menus or ads to get to the good content.

Others may have a contrast sensitivity rather than, or in combination with, low or no vision. When one has a visual issue that affects contrast, the eye has reduced ability to distinguish between similar shades and levels of brightness. That makes the experience of color different from that of what we classify as normal vision. In fact, the popular social networking site Facebook uses color code #3b5998 (dark blue), because its founder Mark Zuckerberg is colorblind. Eye diseases such as Retinitis Pigmentosa, Retinopathy, Cataracts, and Glaucoma all lead to sharp decreases in contrast and/or color sensitivity. The colors actually look different to folks with contrast sensitivities. What you see as red might look brownish or even gray to someone else. This article at MSDN reveals how users with varying colorblindness and contrast sensitivities see web pages.

Accessible Content and Design

When building accessible web pages, we can do many things that will enable their usage for people with assistive technology. The first and easiest step to take in creating visually accessible web pages is to increase the default font size! Most of the citizens of the world do not have 20/20 vision, so increasing the font size is a tremendous gain with only a single line of code to change in the site’s default CSS file. When crafting hyperlinks be sure to set the link text (i.e., the text between the anchor tags) to something descriptive that matches the link target. Avoid generic text such as the words “Click here”, and be sure to include a complete description of what the user can expect on the other side of the link. Applying the name attribute to anchor tags means users can use the keyboard to skip through to that hyperlink.

Two colors that have low contrast might be fine to someone with normal vision, but it is likely harder to distinguish between the colors, letters, and symbols for someone who is colorblind. Quite possibly the most important design concept for accessibility is to keep the site clean of clutter, and navigable with alternative methods of input than a mouse. You can ensure your color schemes and contrast work well by visiting these sites: http://webaim.org/resources/contrastchecker/ and http://www.checkmycolours.com.

Screen readers must read everything on the page they can access (usually DOM and text), and that includes headers and footers that show on every page in the website. It can take several minutes to plow through a menu that a sighted user can scan in just one second. To remedy this, we use Skip Links. Skip links are HTML anchros that allow the speech software or braille user to bypass redundant information, such as navigational menus. Speech and braille users generally read the page from top to bottom,  and consequently are subjected to repeated information before reaching the heart of the page. All you need are two lines of code. Just put an anchor before the repeated HTML (usually a menu), or right at the beginning of the page, like this:

<a href=”#content”><img src=”empty.gif” height=”15″ border=”0″ alt=”Skip Main Navigation” width=”5″></a>

Then place a named anchor at the beginning of the unique content, where the reader’s eyes would normally skip to:

<a name=”content”></a>

Then you have a skip link. This tag can exist anywhere in the page that you think the screen reader should land, so it can continue reading from there. Adding something as simple as skip links in your source enables the machine reader to save a significant amount of time on behalf of the user. Check out the skip links at WebAIM. They work perfectly.

Accessible HTML Layout and Elements

You can craft accessible HTML with little to no extra effort than you normally use in your daily development tasks. Simple things like using header tags, <h1> through <h6>, make the page navigable via keyboard, as low vision users may have difficulty seeing where to mouse. Avoid using <div>, <span>, or <p> tags with larger fonts, as they don’t allow for keyboard navigation or work well with assistive technologies. Besides, <h1>-<h6> are meant for headings. When displaying media, each <img> element must have clear and succinct alt attribute value, as this is the only way assistive technology such as screen readers and braille machines can convey what is inside the image. This is an easy coding task. When laying out sections of pages with HTML <tables>, be sure to include the <th> elements for navigation and assistive technology, rather than using <td> tags for column headings.

The Web Accessibility Initiative established WAI-ARIA, the Accessible Rich Internet Applications Suite, as a way to make Web content and sites more accessible to people with disabilities of any sort that makes computing unnecessarily difficult. WAI-ARIA published a set of standard attributes so that HTML can integrate with assistive technologies.

Many popular websites, especially news sites, will be disheartened to hear that JavaScript cascading menus and JavaScript popup ads (jQuery lightboxes) make it an order of magnitude harder for low vision and blind users. Often, ads fly in from the top, bottom, and sides of a page, and march across the screen making it impossible for assistive technology to translate what’s going on to the user. Screen readers and braille machines can’t do their jobs properly under these conditions. When this happens, low vision users must leave the site as it becomes simply unusable. Considering the numbers of visually people internet is 10% of your user base, you’re turning away a big chunk of your user base just by using popups. There are better ways to advertise.

Accessible HTML Forms

Submit and reset buttons as well as the <button> element automatically work with assistive technology. You must make some minor modifications to other form elements though. Using the <label> element is a very effective way to enable screen readers and braille machines to present the text and meaning of any HTML input tag. When building HTML forms in general, be consistent with the placement of labels and input fields, and be sure to explicitly state required fields and validation. While it is a common practice to indicate which items are required fields with a non descript red asterisk or icon, it is not very accessible. Adding the word “Required” or a precise description of the validation message to the label makes validation rules clear to readers and devices. Label all input elements of the form. Below is a sample of the proper way to label for accessibility:

<label for=”fullName”>Full Name </label><input id=”fullName” type=”text” />

Notice that the <label>’s for attribute matches the <input>’s id attribute. Without this connection, visual assistants cannot determine which labels belong to which element. When working with dropdowns, label the entire dropdown as well as each individual item in the dropdown by placing text between the <option> elements.. 

<label for=”favoriteLanguage”>Choose your favorite programming language:</label>
<select id=”favoriteLanguage” name=”select”>
    <option value=”1″>C#</option>
    <option value=”2″>VB</option>
    <option value=”3″>JavaScript</option>
    <option value=”4″>Ruby</option>
    <option value=”5″>Lisp</option>
</select>

Checkboxes only need that you use the <label> element, and they’ll work with readers. The American Association of the Blind recommends avoiding Radio buttons, stating that many of the assistive programs out there do not support them well. Since radio buttons often represent simple binary data or yes/no answers, a checkbox should work fine as an alternative. You can move to a drop-down for three or more items.

<label for=”yesNoAnswer”>Is C# your favorite language?</label><input id=”yesNoAnswer” type=”checkbox” />

In addition to open standard HTML, the WAI-ARIA standards provide ARIA tags that you can use to enhance assistive technologies, especially in HTML forms. You can apply the aria-label attribute to elements that have no text, such as an image or a submit button. Form elements that you require the user to fill in should have the aria-required attribute set to “true”. Our previous example that creates a text box to contain a full name can be expanded like this:

<label for=”fullName”>Full Name </label><input aria-label=”Full Name” aria-required=”true” id=”fullName” type=”text” />

It’s not just HTML elements that affect accessibility. While it’s a common practice to set the cursor’s focus to a starting field with JavaScript in HTML forms, doing so interferes with screen readers. The same goes for AJAX scripts that run upon form submissions. Having client side scripts are Ok as long as you don’t forget to test the pages to make sure they work with the keyboard as well as assistive technology, and do not intrude on the user’s workflow. You can read more in depth about techniques for HTML form accessibility at WebAIM online.

Conclusion

The American Association of the Blind has many resources for creating visually accessible web sites. Hide your mouse away while testing web pages to force yourself to be a keyboard user, and test for harmony with assistive technology. You can do so by trying out a few of these 10 free screen readers, or the Web Anywhere browser based screen reader that requires no software installation. Before you publish your web site check out the Web Accessibility Evaluation Tool (WAVE). This tool lets you plug in a URL and it will show that same page with annotations specifying its level of accessibility compliance. Finally, Microsoft has released an Accessibility Center where you can learn about various development techniques and tools to help you reach all of your customers.

Use SignalR to Build Real-Time Connectivity into Your Software

You want to write software that works just like popular social networking sites do, with lively, immediate information. That means building real-time high-frequency updates into your software, because users want their data and they want it now. In some situations, moving data in real-time is essential to the success of the app as it gives an upper hand to the business that does so. Not just that, but let’s face it – it’s cool to be the developer who writes the high tech websites. If you want to build these modern websites and apps with live, two-way communication, then SignalR is something you should seriously consider.

What is SignalR and why should you use it?

SignalR is a set of libraries that facilitate easy development of these kind of real-time websites and apps. It is open source, and you can get it here: GitHub. It works across all the major platforms. SignalR the newest member of the ASP.NET family, that enables developers to write incredibly simple real-time, two-way websites and apps. Two-way communication means that both the server and client share an open channel in which they can initiate contact with each other.  This channel is high-speed and works both directions between server and client. Many kinds of software can benefit from the real-time, two-way, communication system of SignalR. They include high traffic finance and stock apps, auctions, voting, quizzes and polls, lotteries, games, and many more. If your app’s not in the list, you still might want to investigate Signal, as UXs with high-frequency updates tend to be the ones that the users prefer (and rate higher for those in app stores).

SignalR is built to the OWIN specification. OWIN, short for Open Web Interface for .NET, is a set of standards for constructing a pluggable, modular, Web server architectures. Fortunately as SignalR developers, we don’t really need to dig into the specs to write SignalR code, most of the time.

Conceptually, SignalR works like a hub and spoke, or hubs and clients, as we call them. This means that the client can call the server, like we normally see in a HTTP Request-Response model, but now the server can contact the client, and one client can contact other clients (through the server). This is not the kind of programming that web developers usually do. SignalR contains two primary components: Hubs and Clients. Hubs, as you might expect, are server side and they behave a lot like super fast switchboard operators (oxymoron?). Clients, on the other hand, behave the same, except that now they can also receive calls from the server. This is where SignalR differs from customary Web programming, in that both sides can initiate communications between each other once the client initially opens the pipeline.

SignalR uses Websockets technology everywhere that it possibly can, and when it’s not possible, it uses an algorithm to determine the best possible transport. It supports the following transports: WebSockets, Long Polling, Server Side Events, and Forever Frame. As developers, we barely need to know cursory information about these frameworks to benefit from SignalR.

Get Started With SignalR Development

Since SignalR is an ASP.NET product, we’ll need to create an ASP.NET project in Visual Studio (unless you self-host, but we’ll stick with ASP.NET here). You can go with either Web Forms or MVC, as SignalR is also ASP.NET, and it all works together. Then install the “Microsoft ASP.NET SignalR” package into the ASP.NET project, using either the GUI or the Package Manager console. When you install the generic “Microsoft ASP.NET SignalR” package, it installs a few dependencies. Those are both server and client side components that work in tandem so that SignalR can do its thing. You can verify the installation by checking for references to Owin under the project references and jquery.signalr-2.0.3.js and similar files under the Scripts node in Solution Explorer.

Every site needs a starting point, and for SignalR apps, we need to hook into the OWIN pipeline of modular architecture. That means that we need to run a quick bit of code during startup. To do so, put the following code in a class in App_Start. This tells ASP.NET that the SignalR OWIN modules will be part of the regular IIS pipeline. Below is sample startup code for a voting app. The app loads several images and allows users to vote on one or more items.

[assembly: OwinStartup(typeof(VoteR.App_Start.Startup))]

namespace VoteR.App_Start
{
    public class Startup
    {
        public void Configuration(IAppBuilder app)
        {
            app.MapSignalR();
        }
    }
}

Once we insert the startup code, we can move to our centerpiece of activity, the hub.

Hubs

Hubs enable developers to write code to accept calls from clients and call methods on clients. When many people are voting, the action happen incredibly fast, so it’s a perfect candidate for real-time connectivity. Not to mention that users want to see the vote total updating in real time. Let’s see this in action by examining the VoteHub class. The VoteHub class inherits from the Microsoft.AspNet.SignalR namespace. In this class is the Vote public method that that the clients can call, and when they do, it is syntactically similar to an ASMX Web Service call, meaning that it uses standard dot notation (see the Clients section of this post). The private AddVote method is just a method that public
or other private methods call. It accesses some static members to track which client has the highest bid.

public class VoteHub : Hub
{
    private static List<Item> VoteItems = new List<Item>();
    private static VoteRContext db = new VoteRContext();

    public void Vote(int id)
    {  
        // AddVote tabulates the vote        
        var votes = AddVote(id);
        // Clients.All.updateVoteResults notifies all clients that someone has voted and the page updates itself to relect that
        Clients.All.updateVoteResults(id, votes);
    }
    private static Item AddVote(int id) {

        // If the item is in VoteItems, we’re tracking it, so just increment and return
        var voteItem = VoteItems.Find(v => v.Id == id);       
        if (voteItem != null)
        {
            voteItem.Votes++;
            return voteItem;
        }
        // If the item wasn’t in VoteItems, it’s the first time someone voted for it.
        // Add it to VoteItems and increment from zero
        else
        {
            var item = db.Items.Find(id);
            item.Votes++;
            VoteItems.Add(item);
            return item;  
        }    &nb
sp;  

    }
    public override Task OnConnected()
    {       
        // Send voting history to caller only so they can see an updated view of the votes  
        Clients.Caller.joinVoting(VoteItems.ToList());
        return base.OnConnected();
    }
}

Any custom public method (not overrides) in that you add to your Hub class is callable via dot notation from the client, via a special property. Notice that in the above code sample that there is no need to write code to deal with concurrency or transport negotiation, SignalR does it all for you.

Something that is a bit different from standard web development are the calls to Clients.Caller.joinVoting and Clients.All.updateVoteResults. By accessing the Clients property of the Hub class, we can effectively use that open pipeline to call the joinVoting and updateVoteResults methods on the client using dot notation. You can pass simple or complex arguments, as shown in the code above. SignalR does all the serialization of objects such as the List<T> automatically. Let’s see how to define these methods on the client in JavaScript and how SignalR connects Hub and Client code. The Clients property of the Hub contains the following methods: All, AllExcept, Client, Caller, Group and a few other methods that you can use to send messages to specific clients or groups of clients through the Hub. This gives you a granular way to deal with client-client connectivity.

Clients

When using ASP.NET MVC, we can render some the data on the server in Razor views, and add JavaScript for rich client interactions. Below is a Razor view that loops through an IEnumerable<VoteR.Models.Item> object rendering the name, image, number of votes, and a voting button. After every 4th item, the loop moves to the next row. The <script> tags render at the end of the page. Default.js contains SignalR code that votes on behalf of the user and updates the screen with the current number of votes. Because SignalR is real-time, the current number of votes will be up to date. None of the ASP.NET MVC code is different than we normally write. This is a plain MVC view. We’ll use JavaScript to take data from the view and send to the server.

@model IEnumerable<VoteR.Models.Item>
<h2>Vote!</h2>
<table>
    <tr>
        @{var i = 1; }
            @foreach (var item in Model)
            {
                <td style=”border:1px solid #000; width=”200px”>
                    <h4>@item.Name</h4>
                    <div><img src=”@Url.Content(item.Image) width=”125″ height=”125″ /></div>
                    <h4>Votes: <span data-itemid=”@item.Id“>0</span></h4>
                    <button id=”@item.Id“>Vote For This</button>
                </td>
                if (i % 4 == 0)
                {
                    @:</tr><tr>
                }
                i++;
            }
        }
    </tr>
</table>

@section scripts {
    <script src=”~/Scripts/jquery-1.10.2.js”></script>
    <script src=”~/Scripts/jquery.signalR-2.0.3.js”></script>
    <script src=”~/signalr/hubs”></script>
    <script src=”~/Scripts/default.js”></script>
}

With script, we first must obtain a connection to the VoteHub and store it in the voteHub variable. Notice the syntax , $.connection, is a static reference. This is a proxy that SignalR automatically creates for us at the /signalr/hubs location. You need do nothing special for the proxy to work.

In the JavaScript below, in the assignment of voteHub property, the $.connection.voteHub part might look like a typo, but SignalR uses camelCasing on the client following popular JavaScript notations. This means that the default manner in which you reference the VoteHub class is voteHub. You can change this by adding the HubName attribute to the Hub class (server side) and specifying the exact name and case of the class, like this: HubName(“VoteHub”). The it changes the proxy to reflect the casing.

After obtaining a connection to the hub, we must start the hub if it isn’t already started. This is a good time to wire up any events such as click events where you’ll be calling hub methods. After wiring up calls to the hub, it’s time to declare methods that the server will call. In the example below, these methods are voteHub.client.joinVoting and voteHub.client.updateVoteResults. Notice their declaration uses the hub.client.method syntax, hanging the methods off of the client property of the reference to the hub. To call code on the server, just use the server property of the client side hub object. In this case, that is voteHub.server.vote. The code passes the value of this.id to the method. “This”, in this case is the button containing the ID of the item the user is voting for.

$(function () {
    var voteHub = $.connection.voteHub;
   
    $.connection.hub.start().done(function () {
        $(“button”).click(function () {
            voteHub.server.vote(this.id);
        });
    });

    voteHub.client.updateVoteResults = function (id, vote) {
        var voteFor = $(“span[data-itemid='” + vote.Id + “‘]”);
        voteFor[0].textContent = vote.Votes;
    }

    voteHub.client.joinVoting = function (votes) {    
        for (i = 0; i <= votes.length – 1; i++) {
            var voteFor = $(“span[data-itemid='” + votes[i].Id + “‘]”);
            voteFor[0].textContent = votes[i].Votes;
        }
    }
});

When a new user connects, the OnConnected method in the Hubs example calls the client side joinvoting and passes in voting history. This way the new voter is current, as joinVoting also displays all the information about all the votes in progress. Examining either the voteHub object or Hub class, you’ll see the server and Clients properties. These are the properties that enable the two-way real-time communication between the hub and the client. All you do is attach public methods to them and make the calls using the hub.server.method syntax. Finally The updateVoteResults method does the UI update, so each item’s <span> element displays how many votes it has.

Conclusion

There are many kinds of websites and apps that can benefit from SignalR’s real-time, two-way, communications model. Perhaps a stockbroker needs financial information to buy the right stock at the right time and get a promotion. Or maybe someone is building the next big thing in social networking and the “likes” need to happen right away. That high-action game that everyone is addicted to needs to be in real-time or people wouldn’t enjoy it as much. If it’s an app, enjoyment and a rich experience translate directly to ratings, which in turn translates to more visibility and revenue.

While in this article I’ve only mentioned Hubs and clients, there is lower level of abstraction that SignalR offers called a Persistent Connection. If you, for whatever reason, need to perform more of the lower level tasks regarding connection management, the PersistentConnection class is what you’d use. If you check out the members of the PersistentConnection class, they look a lot like the Hub class but with more members regarding connectivity. It gives you more gr
anular control, but for most scenarios, hubs and clients will work just fine.

Download sample code: https://github.com/rachelappel/VoteR 

Resources:

ASP.NET SignalR

SignalR.net

Scott Hanselman on SignalR

Designing and Programming Accessible Websites and Apps

All too often, popular websites and apps fail to design for accessibility, unknowingly resulting in a huge loss of potential customers who cannot consume or access the site. This is all too often due to overestimating the amount of work it takes to make a website accessible, while also underestimating how many users require accessible content. As you’ll see here, there are a few basics you need to know about designing websites and writing code that considers accessible users as first class users.

Web Accessibility Overview

WebAIM http://webaim.org/intro/#people says that about 20% of the population has some sort of disability that affects their lives, and often it affects the way they use the internet. That means 62.8 million Americans and 1.4 billion people worldwide.

There are four main types of disabilities that one might contend with, and that you can consider when designing  websites and apps.

  1. Visual : Vision impairments range from a slight loss of vision to complete blindness. Contrast sensitivity and colorblindness are also common visual impairments.
  2. Auditory: Often, those with hearing impairments cannot discern background noise from important sounds, or have any degree in loss of hearing, or a combination thereof.
  3. Motor : Diseases such as dyslexia, ALS, and Parkinson are often behind a motor impairment. Neurological and spinal damage contribute as well to motor impairments.
  4. Cognitive : ADHD, Dyslexia, and other disorders contribute to the challenges these folks face in using the web.

In other words, there is no “normal”. For every human quality or behavior runs across spectrum. Some can navigate a site easily where others need help. The majority of the population might see red one way, but those with color vision differences will not. People from every walk of life and corner of the planet range in their ability and opportunity. As developers who create websites that can theoretically reach almost the entire world, we should ensure that as many as users possible can access our products that we build, be they websites or native apps. Good developers want to make it as easy as possible for all (or as many as possible) users.

At some point, everybody will need some assistive technology, even if it is what you’d consider a primitive one.


image_thumb1

(Image says: I just used the accessibility settings on my iPhone to change the systemwide font to BOLD. Pure win. Give it a try.)

Me too. I must increase fonts on most websites and the default zoom in all browsers to clearly read any text. Sometimes something small like a font increase makes a big difference. Even to those who are considered able bodied like Scott and myself.

Designing with Accessibility in Mind

Way back in the beginning days of the internet, browsers and BBS software displayed little more than text. Fast forward a few decades and now the Web is largely visual. That means that a large percentage of data that crosses the internet is in the form of a image, video, or audio file, often to accompany, and as frequently to replace textual data. This change in data format is due to the wide availability of broadband connectivity. It has also contributed to many sites relying only on graphic data, which shuts out or limits a significant portion of the population from consuming the content. Below is a quick laundry list of things to consider when designing with accessibility (any of the above impairment types) in mind. Notice that most of these things will make it easier for those without disabilities as well.

  • Fonts should be large, clear, and have a high contrast
  • Use HTML5 semantic elements
  • Colors should have high contrast
  • Use a consistent and clear navigation scheme
  • Provide alternate ways to interact with the user instead of just the mouse and keyboard
  • Field tab orders should be straight forward
  • Label fields and elements such as buttons using the <label> element
  • Images should have alt attributes set to something quick and descriptive
  • Movies and animations should provide captions or transcripts
  • Organize content into distinct sections with clear headings

The list of techniques and suggestions above reveal not just things to do to make your site more accessible but these are indeed best practices in the realm of proper standard UX design. That’s because users should be able to access content from their favorite browser, OS, or device, including those with accessibility needs.

Summary

I’ve authored a few articles on designing and programming for accessibility at Internet Explorer’s Modern.IE site, that expand on this post by going into more depth about programming for visual, auditory, motor, and cognitive impairments.

Both WebAIM and Microsoft have an online Accessibility Center containing lots of great information about designing an accessible web.

Use the W3C Geolocation API to create location aware web sites

Location aware services and applications are becoming more important than ever before, as smartphones, tablets, and other fully featured mobile devices become ubiquitous. The W3C Geolocation API gives developers an easy way to integrate client side location aware services within their web pages.

Hello, location aware world!

With the advent of geolocation services and mapping APIs, web sites and applications are popping up daily providing the following types location aware software:

  • Games and social applications, (e.g., Foursquare, Twitter, Trip It, Facebook, etc…)
  • Search applications for local services (e.g., restaurants, shops, entertainment, etc…)
  • Navigation & maps
  • Package shipping/tracking & transportation services
  • Personal health & fitness
  • More…

Notice there’s a good mix of both business and consumer applications that benefit from using geolocation. Fortunately, for developers, location aware web sites and apps are easy to create with web standards like HTML5, JavaScript, and CSS. On top of that, APIs like Bing  or Google Maps make great companions to these sites – and don’t forget 3rd party APIs such as Foursquare or Yelp.

How location aware web sites work

Geolocation apps work by detecting the user’s location via positional data that it receives from a geolocation source.

There are three basic steps to the process:

  1. The client browses to a web page that attempts to access the geolocation source.
  2. The app requests permission to send access the geolocation source.
  3. If the user permits, the app or web site can access and use the user’s positional data. (If not, an error occurs. See below

Once you have obtained the user’s coordinates from the API, you can display maps, give directions,show nearby points of interest

However, keep in mind that the device is the deciding factor regarding the accuracy of the positional data. For example, using a 3G smart phone should yield more accurate results than a desktop machine that connects through an ISP a mile away, using an IP address based method. Devices can use one or more of these methods:

  • Coordinate triangulation
  • Global Positioning System (GPS)
  • Wi-Fi with MAC addresses from RFID, Wi-Fi, and Bluetooth
  • IP address
  • GSM or CDMA cell phone IDs
  • Custom sources: Some phone manufacturers like Nokia

Many smart phones provide a way for users to switch between sources such as 3G or WIFI.

Obtaining the user’s positional data using the HTML5 Geolocation API.

For creating web sites either straight-up JavaScript or jQuery will work fine with the geolocation API. It’s quite small, with only three methods:

Method Description
clearWatch Stops listening for updates to the current geographical location.
getCurrentPosition Obtains the geographic position, in terms of latitude and longitude coordinates.
watchPosition Begins listening for updates to the current geographical location of the device running the client. Use this method to listen for location updates.

Before obtaining the user’s coordinates, a call to Modernizr performs feature detection for geolocation support. If the browser supports geolocation, the code calls the watchPosition() method, and passes success and error callback methods as arguments. Below is the code sample outlining  the call to watchPosition().

$(function () {
    var watchID;
    $("#watch").click(function () {
        if (Modernizr.geolocation) {
            var nav = window.navigator;
            if (nav != null) {
                var geoloc = nav.geolocation;
                watchID = geoloc.watchPosition(successCallback, errorCallback);
            }
        }
        else
        { $("#message").text("You'll need to enter your address manually."); }
    });   
});

.csharpcode, .csharpcode pre
{
font-size: small;
color: black;
font-family: consolas, “Courier New”, courier, monospace;
background-color: #ffffff;
/*white-space: pre;*/
}
.csharpcode pre { margin: 0em; }
.csharpcode .rem { color: #008000; }
.csharpcode .kwrd { color: #0000ff; }
.csharpcode .str { color: #006080; }
.csharpcode .op { color: #0000c0; }
.csharpcode .preproc { color: #cc6633; }
.csharpcode .asp { background-color: #ffff00; }
.csharpcode .html { color: #800000; }
.csharpcode .attr { color: #ff0000; }
.csharpcode .alt
{
background-color: #f4f4f4;
width: 100%;
margin: 0em;
}
.csharpcode .lnum { color: #606060; }

A successful completion of the watchPosition() method triggers the successCallback() method. At this time, the code can access the positional data returned from the Geolocation service in order to display Bing maps, list nearby attractions, or whatever is required. Below shows code that obtains the user’s coordinates, then displays the latitude and longitude in a web page <div> element (<div id=”message”>). Notice that the position argument  is populated with data, however not all the properties will contain values (e.g., altitude), depending on the capabilities the device and service.

function successCallback(position) {
 
    var latitude = position.coords.latitude;
    var longitude = position.coords.longitude;
 
    $("#message").text("There you are at " + latitude + " " + longitude);
}

.csharpcode, .csharpcode pre
{
font-size: small;
color: black;
font-family: consolas, “Courier New”, courier, monospace;
background-color: #ffffff;
/*white-space: pre;*/
}
.csharpcode pre { margin: 0em; }
.csharpcode .rem { color: #008000; }
.csharpcode .kwrd { color: #0000ff; }
.csharpcode .str { color: #006080; }
.csharpcode .op { color: #0000c0; }
.csharpcode .preproc { color: #cc6633; }
.csharpcode .asp { background-color: #ffff00; }
.csharpcode .html { color: #800000; }
.csharpcode .attr { color: #ff0000; }
.csharpcode .alt
{
background-color: #f4f4f4;
width: 100%;
margin: 0em;
}
.csharpcode .lnum { color: #606060; }

Of course, the code won’t always run successfully. There are many things that can get in the way: bad weather, permission denied, timeouts, no cell reception, and gremlins, to name a few.

Dealing with errors and timeouts

The errorCallback() function does what you might expect, it runs when an error occurs. There are three frequently occurring errors to look for when the errorCallback() executes:

  1. PERMISSION_DENIED
  2. POSITION_UNAVAILABLE 
  3. TIMEOUT

A switch statement works nicely to determine the error source and take corrective action, as each case checks value in the error.code property against a set of constants that correspond to error numbers.

function handle_errors(error) {
    switch (error.code) {
        case error.PERMISSION_DENIED: 
            alert("User did not share geolocation data");
            break;
        case error.POSITION_UNAVAILABLE: 
            alert("Could not detect current position");
            break;
        case error.TIMEOUT: 
            alert("Time out");
            break;
        default: 
            alert("Unknown error");
            break;
    }
} 

.csharpcode, .csharpcode pre
{
font-size: small;
color: black;
font-family: consolas, “Courier New”, courier, monospace;
background-color: #ffffff;
/*white-space: pre;*/
}
.csharpcode pre { margin: 0em; }
.csharpcode .rem { color: #008000; }
.csharpcode .kwrd { color: #0000ff; }
.csharpcode .str { color: #006080; }
.csharpcode .op { color: #0000c0; }
.csharpcode .preproc { color: #cc6633; }
.csharpcode .asp { background-color: #ffff00; }
.csharpcode .html { color: #800000; }
.csharpcode .attr { color: #ff0000; }
.csharpcode .alt
{
background-color: #f4f4f4;
width: 100%;
margin: 0em;
}
.csharpcode .lnum { color: #606060; }

Summary

Location aware web sites are becoming more important than ever before, and since the W3C Geolocation API is a standard, it works with any technology ranging from plain HTML to ASP.NET.

To get started creating location aware sites, check out the following resources:

W3C Geolocation Introduction

Geolocation APIs & client side frameworks on Code Project

Upload and download files using ASP.NET MVC

Uploading and downloading files are common functions you’ll see in most websites and apps. Fortunately, it’s easy to write code to upload and download files using ASP.NET MVC. To start, we need a view and controller pair to upload a file. This is the same HTML and MVC code that you already know. However, there is no need for the model portion of the MVC pattern if you are only uploading files to disk and not working with a database. Otherwise, files can be a property of a model, for example, a profile picture.

The upload view

First, we must start in the view by creatingan HTML <form> element. You can create the form with the Html.BeginForm helper and pass in the following arguments, in the following order (for this particular overload signature):

  1. Action method name : Action method that processes uploaded file
  2. Controller name : Controller that belongs to above action method
  3. FormMethod : Any acceptable HTTP verb
  4. enctype : Appropriate encoding type

Using Helpers is a great way to take advantage of built in features of the ASP.NET MVC framework such as accessing routing information to create a link or using strongly typed objects to render HTML. In the case of the Html.BeginForm helper, we are rendering a <form> element. The Html.BeginForm helper expects an enctype attribute that designates that the form can send binary data as well as textual data in the HTTP POST request. Since the default encoding type is “text-plain” the HTTP Request will not send binary data (that means files!) to the server along with the usual textual form data, so you must set the enctype attribute to multipart/form data or it will not work!

Below is a complete sample of an MVC view containing a form with a file input and submit button:

@using (Html.BeginForm("Upload", "Home", FormMethod.Post,
    new { enctype = "multipart/form-data" } ))
 {
    @Html.AntiForgeryToken()

    <fieldset>
        <legend>Upload a file</legend>
        <div class="editor-field">
            @Html.TextBox("file", "", new { type = "file" })
        </div>
       <div class="editor-field">
            <input type="submit" value="Upload" />
        </div>
    </fieldset>
}

ASP.NET Web Forms has a FileUpload Control, but in ASP.NET MVC our options are either a plain HTML element such as <input type=”file” /> or the TextBox and TextBoxFor Html Helpers (or any helper that outputs a file field). Any Html Helper that outputs an <input type=”file”> tag works. In the example above, the type, id, and name attributes of this tag are all set to “file”. A quick look in the browser using the IE Developer Tools illustrates what the Html.BeginForm and TextBox helpers from the above code sample have rendered:

image_thumb2

When the user clicks the submit button, it causes an HTTP POST submission to /Home/Upload, which maps to the Home Controller’s Upload action method. The Upload action method receives the file and form data and from there you can perform the actual upload and save the file to disk or put in the cloud.

The upload action method

Action methods of MVC Controllers accept incoming HTTP requests for processing. Each HTTP request has a certain way, or method (POST GET PUT DELETE etc..) that it sends data to the server. The receiving action method must expect that type of request in order to process it. Since HTTP GET is the default, you must apply the HttpPost attribute to the Upload action method. This, of course, matches the method=”post” attribute of the HTML <form> element.

You can access uploaded files in the action method by querying the argument that is of type HttpPostedFileBase . The name of this argument, “file” in the below sample, must match the name of its corresponding file input in the HTML form (i.e., <input type=”file” name=”file”>). This allows ASP.NET MVC’s model binding to occur for file uploads. Ensuring the names match is using a concept called Convention over Configuration and leads to more readable code.

[HttpPost]
public ActionResult Upload(HttpPostedFileBase file)
{
    try
    {
        if (file.ContentLength > 0)
        {
            var fileName = Path.GetFileName(file.FileName);
            var path = Path.Combine(Server.MapPath("~/App_Data/Images"), fileName);
            file.SaveAs(path);
        }
        ViewBag.Message = "Upload successful";
        return RedirectToAction("Index");
    }
    catch
    {
        ViewBag.Message = "Upload failed";
        return RedirectToAction("Uploads");
    }
}

If you need to upload multiple files, use IEnumerable<HttpPostedFileBase> instead of a single HttpPostedFile and loop through the collection to access individual files. When completing an upload, be sure that you have the correct permissions to write to the directory you want, then use classes from System.IO to access the file system and save the file.

System.IO.Path.GetFileName retrieves a file name including its extension, and System.IO.Path.Combine combines two or more strings to create a complete path. Because we’re working with an uploaded file from HTTP, we need Server.MapPath to map a virtual path (HTTP) to a physical directory (C:) . In this case the mapping is from the webroot, i.e., “~/” to the <project root>App_DataImages directory. I’m saving files to the App_Data directory to demonstrate concepts, but in real world sites it is unlikely that internet users would have privileges to save files there, so check with your sys admin or Web hoster as to where you should upload and download files

The sample code above also overwrites any existing files, so if that’s an issue you can generate a unique file name by spinning up a Guid and using that as the name, as shown here:

var guid = Guid.NewGuid();

If the file to upload is accompanying form data, the controller action method signature should contain the model type and an HttpPostedFileBase type for the file. For instance, if the file is a user’s profile picture and part of a Person model, the action method signature should look like the following:

public ActionResult Upload( Person Person, HttpPostedFileBase file ) {… }

If you are using Convention over Configuration then model binding will take care of everything and all you do is access the method’s arguments.

In order to download, we need the same MVC components – a view and a controller. We’ll start at the controller.

The Download Action Method

Usually the UI presents a list or grid of links or images in which the user can click to download an image or file. What we’ll use for this example is a simple list of links of images to download. We can do this by creating a List<string> to store the file names in hyperlinks for download. The code below shows obtaining the directory and file information and adding the file names to the list of strings. The method then returns the list of strings as a model to the view.

public FileActionResult Downloads()
{
    var dir = new System.IO.DirectoryInfo(Server.MapPath("~/App_Data/Images/"));
    System.IO.FileInfo[] fileNames = dir.GetFiles("*.*");
    List<string> items = new List<string>();

    foreach (var file in fileNames)
    {
        items.Add(file.Name);
    }

    return View(items);
}  

The view accepts the list of strings and displays them in the page.

The Download View

Notice that the model for this view is a List<string> type instead of a custom object as usual. Of course, this the view consists of a simple for loop that cycles through a list of strings containing the file names and displays them in <label> and <a> tags. The hyperlinks render so that they point to the Home controller’s Download action method, and pass in the name of the file as a URL parameter. Cycling through a list of strings means that you can use array syntax (i.e., @Model[i]) to access each member in the list.

@model List<string>

<h2>Downloads</h2>
<table>
    <tr>
        <th>File Name</th>
        <th>Link</th>
    </tr>
    @for (var i =0; i <= Model.Count -1; i++) {
        <tr>
            <td>
                @Model[i].ToString()
            </td>
            <td>
                @Html.ActionLink("Download", "Download", new  { ImageName=@Model[i].ToString() })
            </td>
        </tr>
    }
</table>

The image below is what the download view produces. The ActionLink Helper renders links that point to the Home controller’s Download action method, passing in the image name as a query string. I’m using the defaults but you might want to consider configuring Routing so that the URL looks friendlier.

image

As users click on the download link, the Download action method returns a FileResult:

 public FileResult Download(string ImageName)
{
   
return File(“<your path>” + ImageName, System.Net.Mime.MediaTypeNames.Application
.Octet);
}

However, you can also return a FileContentResult, FilePathResult, or  FileStreamResult (don’t forget to match the action method’s return type to the type you will use):

FileContentResult : Use this when want to use a byte array to access the file. In this scenario, you might have obtained the file as a byte array from a database call.

return new FileContentResult(byteArray, “image/jpeg”);

FilePathResult  : Returns a file on disk when you must access via a file path. In the FilePathResult you can return a File type or a FileStreamResult.

return new FilePathResult(“~/App_Data/Images/” + ImageName, System.Net.Mime.MediaTypeNames.Application.Octet);

FileStreamResult : Sends a stream out to the response.

return new FileStreamResult(new FileStream(“<your path>”, FileMode.Open), “image/jpeg”);

The various ways to return a file are very similar but allow sufficient customizations to meet the needs of most scenarios. Sometimes the file is from a stream or byte array, or sometimes you only have a simple file path. Media types as well as the System.Net.Mime.MediaTypeNames enum are available so you can designate the file type for download, as the above samples demonstrate.

Summary

Code for uploading and downloading files are mandatory tasks for Web developers at some point in time. We want to allow users to safely upload and download files to go along with other data, and using ASP.NET MVC means you can use Html Helpers as an easy way to provide this functionality.

More on the dev tools:

Profile & Tune Web Pages Using IE Developer Tools

Investigate Web Pages Using IE Developer Tools

More on the Razor view engine:

Introducing ASP.NET MVC development w/the Razor view engine

How data annotations for ASP.NET MVC validation work

Data validation is one of the most important aspects of developing applications for the web. However, validation is also something that can get messy pretty quickly, as developers often stick validation code anywhere and everywhere. However, if you keep a clear separation of concerns by using the MVC pattern and couple that with data annotations in the model, then your validation code becomes much simpler to write, maintain, and test. The added bonus: simple code that’s well written & tested is code that’s just going to work.

What are data annotations?

Data annotations are attribute classes that live in the System.ComponentModel.DataAnnotations namespace that you can use to apply to (decorate) classes or properties to enforce pre-defined validation rules. These annotations are available across various Visual Studio 2010 project types including ASP.NET MVC, Web Forms, ASP.NET Apps & Web Sites, Dynamic Data & even non ASP.NET projects like Silverlight & WPF. The same holds true for the data models; you can use these annotations with POCOs (plain old CLR objects), EF models, Linq2SQL models, etc… The bottom line is that you can use data annotations anywhere.

There are several out of the box data annotations to choose from:

  • Required
  • Regular Expression
  • Range
  • ZipCode
  • DisplayName
  • DisplayFormat
  • Scaffold
  • DataType
  • StringLength
  • A few more…

Although having this set of built in validations is great, it is a limited set. Since every business has lots of rules that don’t neatly fit into this pre-defined set of attributes, what do you do when you need to use your own logic? It’s quite easy, really – just derive from any of the inheritable (non sealed) attribute classes in the System.ComponentModel.DataAnnotations namespace, then code your business rules in the derived class methods.

Between the built-in validators and your own custom validation code, you’re all set with maintainable and clean validation. However, server side data sanitization & validation is also equally important. An upcoming blog post will cover creating custom & server side validation. In the meantime, Brad Wilson from the ASP.NET team has some great blog posts on unobtrusive validation along with a a great series of posts on MVC.

And it all starts in the data model…

Applying data annotations to the model.

Suppose a data entry clerk needs to frequently update baked products with baked and expiration dates, amounts, prices, etc… To accomplish this in code, start with a basic POCO class to represent a product and will serve as the data model to meet the needs of this scenario. You’ll need to do more than just create the class and its members though, and that’s where annotations come into play.

Data annotations serve as a way to enforce these common validation scenarios without having to write much code, and more importantly, without writing repetitive code. Annotations live in one place – the model, rather than a code behind, web page, controller, or view. This helps prevent data validation code from turning into Spaghetti# code[1] scattered about your project.

Take a look at the following Product class, complete with a few basic data annotations:

public class Product 
{
public int Id { get; set; }

[DisplayName("Delicious Treat")]
[Required(ErrorMessage = "The product name field is required.")]
public string Name { get; set; }

[Required(ErrorMessage = "The product description field is required.")]
public string Description { get; set; }

[DisplayName("Sale Price")]
[Required(ErrorMessage = "The Sale Price field is required.")]
public decimal Price { get; set; }

[DisplayName("Freshly Baked on")]
[Required(ErrorMessage = "The Freshly Baked On field is required.")]
public DateTime CreationDate { get; set; }

[DisplayName("Don't Sell After")]
[Required(ErrorMessage = "The Expiration Date field is required.")]
public DateTime ExpirationDate { get; set; }

[DisplayName("Qty Available")]
[Required(ErrorMessage = "The Qty Available field is required.")]
[Range(0,120)]
public int QtyOnHand { get; set; }

[DisplayName("Product Image")]
public string ImageName { get; set; }
}

The above properties are labeled with attributes that clearly state their intentions. The bulk of the validation is simply the Required attribute for this sample, along with a Range attribute on the QtyOnHand property. Some attributes such as the DisplayName attribute don’t necessarily validate but do affect the rendered output. As the above sample demonstrates, any combination of necessary attributes can decorate properties. Notice that all the model and validation code so far live in the same place, and will continue to do so when you create custom attributes and validators; meaning that you’ll continue to have a nice, clean separation of concerns in your app.

Once you’re done applying attributes to the model, you can move on to the controllers and views.

Where do views & controllers fit in?

Views:

Once you’ve setup validation on the model using data annotations, they’re automatically consumed by Html Helpers in views so the helpers can render the proper HTML output. For client side validation to work, you will need to ensure that these two <SCRIPT> tag references are in your view:

<script src="@Url.Content("~/Scripts/jquery.validate.min.js")" type="text/javascript"></script>
<
script src="@Url.Content("~/Scripts/jquery.validate.unobtrusive.min.js")" type="text/javascript"></script
>

Note: If you’re using ASP.NET MVC 3 project templates, these script tags will be added in views automatically for you by selecting the “reference client script libraries” option in the Add View dialog.

The following code from an edit or insert view will make sure the DisplayName, Required, and Range attributes work at run time.

<div class="editor-field">
@Html.EditorFor(model => model.QtyOnHand)
@Html.ValidationMessageFor(model => model.QtyOnHand)
</div
>

Other helper methods such as @Html.TextBox, @Html.TextBoxFor, @Html.Editor, etc… render nearly identical yet very slim output, explained more later in this post. Views play an integral part in validation, yet as the developer you often won’t need to do much in the view other than use the built-in Html Helpers.

Controllers:

Controllers serve as a gateway to accept HTTP POST requests to process incoming data then to match that data with its model and view for rendering. Controllers shouldn’t be a dumping ground for validation code, server side validation code should be called from controller action methods. While you can put validation code directly into the action methods themselves; the practice tends to lead to code that’s less than optimal to maintain, since you’ve started scattering the code about the project. Rather than having code in multiple locations, think about moving server side validation code to a single location near or in the model, or as its own library project.

How validation works.

Both client and server side validation work because of a few conventions in your project that match up data annotations, Html Helpers, rendered output. Html Helpers in views render HTML elements containing attributes that start with the pattern data-val-*. The data-val-* attributes contain error messages, regular expressions, ranges, and other validation information that originates in data annotations.

That means that this decorated code in the model…

[DisplayName("Qty Available")]
[Required(ErrorMessage = "The Qty Available field is required.")]
[Range(0,120)]
public int QtyOnHand { get; set; }

…combined with this code in the view…

<div class="editor-field">
@Html.EditorFor(model => model.QtyOnHand)
@Html.ValidationMessageFor(model => model.QtyOnHand)
</div
>

…turns into this HTML at runtime…

<div class="editor-field">
<input class="text-box single-line"
data-val="true" data-val-number="The field Qty Available must be a number."
data-val-range="The field Qty Available must be between 0 and 120."
data-val-range-max="120" data-val-range-min="0"
data-val-required="The Qty Available field is required."
id="QtyOnHand" name="QtyOnHand" type="text" value="12" />
<span class="field-validation-valid" data-valmsg-for="QtyOnHand" data-valmsg-replace="true"></span
>
</
div
>

The tie-in between the data model annotations and the data-val-* attributes should be clear after reading the above code, but it’s where the client side validation ties in might not be so obvious. Open the Scriptsjquery.validate.unobtrusive.js file and search for “data-val”. Right away you’ll see that the JavaScript uses the data-val-*, input-* and field-* CSS classes to display/hide validation messages on the client. Although you shouldn’t modify or need to maintain the built-in .js files; it’s worth investigating them to see how things work together in ASP.NET MVC.

function onError(error, inputElement) {  // 'this' is the form element
var container = $(this).find("[data-valmsg-for='" + inputElement[0].name + "']"),
replace = $.parseJSON(container.attr("data-valmsg-replace")) !== false;

container.removeClass("field-validation-valid").addClass("field-validation-error");
error.data("unobtrusiveContainer", container);

if (replace) {
container.empty();
error.removeClass("input-validation-error").appendTo(container);
}
else {
error.hide();
}
}

Having the onError function tied in by only HTML attributes keeps client side validation unobtrusive, or in other words, out of the way of your view code. Annotations combined with unobtrusive validation make both the view and the output are very clean and maintainable. The final result in the browser is fully capable client side validation that falls back to server side validation for browsers without JavaScript enabled. Either way, the same validation happens and the user sees the same error.

image_thumb2

Summary & Code

Data annotations give you a nice way to keep validation and business logic close to the model, and easier to maintain, test and debug. Additionally, cleaner, simpler output leads to faster download speeds and easier integration with client side script libraries like jQuery for UI manipulation.

Although this post focuses on data annotations and client side script, don’t forget that server side validation is very important.

Download the code.

Notes: [1] Spaghetti# is not a real language.

Integrating ASP.NET Web Forms and ASP.NET MVC

With ASP.NET MVC being a mature platform, many Web Forms developers are wondering whether or not they should move to MVC or are thinking about integrating MVC into their existing Web Forms projects. Web Forms has caught up to MVC in many respects. For example, Web Forms V4+ supports routing, and the controls render less HTML than ever before. ViewState went on a diet and is considerably smaller. In the past some have turned to MVC to address these concerns, but no longer is this the case.

If you’re interested in more content about migrating or integrating Web Forms and MVC, see my WintellectNOW video, “Migrating from Web Forms to MVC”. It covers the many concerns developers face when making the decision about whether or not to migrate to a new technology (and whether or not you should at all). In the meantime, below are some practical tips and techniques required when integrating the two technologies.

MVC Integration: Setup, References, and Configuration

You can install the ASP.NET MVC 4 NuGet package that includes all the resources that you need to use MVC such as references, web.config changes, etc… Once you’ve installed the NuGet package there is little you need to do to use MVC except create folders named “Models”, “Views”, and “Controllers” (assuming you are keeping all these in the same project).

image_thumb3

The NuGet Package adds in several changes to the web.config file as well as references to the project that are worth examining. The web.config sample below shows these references:

Location: <configuration><appSettings>

Configure the ASP.NET Web Pages rendering engine settings in the <appSettings> element.

<appSettings>
  <add key=webpages:Version value=2.0.0.0 />
  <add key=webpages:Enabled value=false />
  <add key=PreserveLoginUrl value=true />
  <add key=ClientValidationEnabled value=true />
  <add key=UnobtrusiveJavaScriptEnabled value=true />
</appSettings>

Location: <configuration><system.web>

This code adds various names
paces to the project’s compilation as well as parser filter and base types, which are settings that determine how views render. The namespace references below are the automatic imports to namespaces for use in views only. You must continue use the using keyword in C# code. The general namespace inclusion is in the previous example.

<pages pageParserFilterType=System.Web.Mvc.ViewTypeParserFilter, System.Web.Mvc,
       Version=2.0.0.0, Culture=neutral, PublicKeyToken=31BF3856AD364E35
       pageBaseType=System.Web.Mvc.ViewPage, System.Web.Mvc,
       Version=2.0.0.0, Culture=neutral, PublicKeyToken=31BF3856AD364E35
       userControlBaseType=System.Web.Mvc.ViewUserControl, System.Web.Mvc,
       Version=2.0.0.0, Culture=neutral, PublicKeyToken=31BF3856AD364E35>
  <namespaces>
    <add namespace=System.Web.Optimization />
    <add namespace=System.Web.Helpers />
    <add namespace=System.Web.Mvc />
    <add namespace=System.Web.Mvc.Ajax />
    <add namespace=System.Web.Mvc.Html />
    <add namespace=System.Web.Optimization />
    <add namespace=System.Web.Routing />
    <add namespace=System.Web.WebPages />
    <add namespace=System.Web.WebPages.Html />
  </namespaces>
  <controls>
    <add assembly=Microsoft.AspNet.Web.Optimization.WebForms
     namespace=Microsoft.AspNet.Web.Optimization.WebForms
     tagPrefix=webopt />
  </controls>
</pages>

Location: <configuration><system.webServer><handlers>

These are the ASP.NET runtime HTTP handlers. They are what determines which .dlls service which type of requests at a low level. As demonstrated, these handlers are looking to interact with HTTP via verbs.

<handlers>
  <remove name=ExtensionlessUrlHandler-ISAPI-4.0_32bit />
  <remove name=ExtensionlessUrlHandler-ISAPI-4.0_64bit />
  <remove name=ExtensionlessUrlHandler-Integrated-4.0 />
  <add name=ExtensionlessUrlHandler-ISAPI-4.0_32bit path=*.
       verb=GET,HEAD,POST,DEBUG,PUT,DELETE,PATCH,OPTIONS modules=IsapiModule
       scriptProcessor=%windir%Microsoft.NETFrameworkv4.0.30319aspnet_isapi.dll
       preCondition=classicMode,runtimeVersionv4.0,bitness32 responseBufferLimit=0 />
  <add name=ExtensionlessUrlHandler-ISAPI-4.0_64bit path=*.
       verb=GET,HEAD,POST,DEBUG,PUT,DELETE,PATCH,OPTIONS modules=IsapiModule
       scriptProcessor=%windir%Microsoft.NETFramework64v4.0.30319aspnet_isapi.dll
       preCondition=classicMode,runtimeVersionv4.0,bitness64 responseBufferLimit=0 />
  <add name=ExtensionlessUrlHandler-Integrated-4.0 path=*.
       verb=GET,HEAD,POST,DEBUG,PUT,DELETE,PATCH,OPTIONS type=System.Web.Handlers.TransferRequestHandler
       preCondition=integratedMode,runtimeVersionv4.0 />
</handlers>

Location: <configuration><runtime><assemblyBinding>

Of course if you’re dealing with differing versions of .NET for any type project, you must change assembly bindings. Assembly bindings declare which versions of which libraries to reference in the project. VS will compile against the new redirected binding than the default when you use the settings below:

<dependentAssembly>
  <assemblyIdentity name=System.Web.Helpers publicKeyToken=31bf3856ad364e35 />
  <bindingRedirect oldVersion=1.0.0.0-2.0.0.0 newVersion=2.0.0.0 />
</dependentAssembly>
<dependentAssembly>
  <assemblyIdentity name=System.Web.Mvc publicKeyToken=31bf3856ad364e35 />
  <bindingRedirect oldVersion=1.0.0.0-4.0.0.0 newVersion=4.0.0.0 />
</dependentAssembly>
<dependentAssembly>
  <assemblyIdentity name=System.Web.WebPages publicKeyToken=31bf3856ad364e35 />
  <bindingRedirect oldVersion=1.0.0.0-2.0.0.0 newVersion=2.0.0.0 />
</dependentAssembly>

After configuring the project to incorporate MVC, you’ll need to setup routing.

Controllers and Routing

Routing is an essential component of MVC development, and MVC cannot work without it. In Web Forms V4 and later, routing is baked right in. What you’ll need to do to ensure the proper routes are set is to create a static RouteConfig class, preferably in a file (e.g., RouteConfig.cs) inside the App_Start special folder. After that, add in the code below to assign a generic route.

routes.MapRoute(
    name: “Default”,
    url: “{controller}/{action}/{id}”,
    defaults: new { controller = “Home”, action = “Index”, id = UrlParameter.Optional }
);

Of course, the RouteConfig class won’t instantiate itself. That means you must call its RegisterRoutes function (also static) from the Global.asax.cs file like so:

void Application_Start(object sender, EventArgs e)
{
    RouteConfig.RegisterRoutes(RouteTable.Routes);
}

The last thing to do is use MVC conventions to create the appropriate folders for Models, Views, and Controllers, if you haven’t already. Otherwise, structure your project as you would for use with the MVC pattern, perhaps moving models to their own class library or service layer.

Considerations when integrating Web Forms and MVC

DataSets/DataReaders & Models:

A lot of data is accessed by Web Forms via declarative tags like the <asp:SqlDataSource>, as well as volumes of DataSets and DataReaders in the code behind files. You’ll need to find a strategy for converting these to models, i.e., classes. Some Web Forms projects contain POCOs for models and those often port over quickly. By convention (assuming a single project), model files live in the <ProjectRoot>Models folder and model classes in the <Project>.Models namespace.

ASPX & Views:

ASP.NET MVC ships with two view engines: Web Forms (ASPX) and Razor. The ASPX view engine continues on using the classic <%# %> syntax for code delimiters, while Razor uses only the @ symbol (or @{}) as a way to denote the start of of code. Razor uses a new parsing engine first introduced in ASP.NET Web Pages that produces clean and concise HTML output. However, if you have a team strong in Web Forms they may want to continue using Web Forms syntax. The difference worth mentioning is that the ASPX view engine uses the traditional Web Forms rendering under the hood so technically it builds a control tree and renders it. You just can’t access the elements in MVC views like you can in a Web Forms page by referring to a control as an object in the code behind. This makes Razor much faster as there is no tree to render. In  views, code renders inline, or in placeholders, rather than from scripted code in a code behind. This is a drastic enough difference that you’ll probably need to completely rewrite many Web Forms as MVC views, as opposed to simply reusing pages in MVC. Of course, redoing all pages as views all at once is often not an option because of time and budget, but you can move them one by one.

Any would be controls in MVC become Html helpers. Html Helpers are the cornerstone of ASP.NET MVC views. Like controls, the Html Helpers render chunks of browser friendly output, but helpers emit the least amount of code as possible and in the least obtrusive way. Helpers also accept and render data from the model. This means if you have 3rd party controls, you might want to migrate these pages last or weigh the option of leaving them as Web Forms. This, of course, depends upon the cost-benefit of the developer’s time to build a control vs. buying a new version of one, if one is available. Most popular 3rd party vendors are up to date.

Code Behind Files & Controllers:

It is not uncommon to see a Web Forms code behind file with 5,000+ lines of code. That’s a lot of code for one single Page object. It also makes the page object a Swiss army knife of sorts as Page objects deal with building the UI and doing all sorts of other things. Many developers add CRUD operations directly in the code behind. This page of all trades ends up doing all the chores and this means more complex code and code that is tightly coupled.

MVC leans toward a concept called Separation of Concerns in which each part of the MVC pattern maps to a concern. M for models or data and CRUD operations. V for views or UI. C for controllers or operational code. All the layers are nicely separated. If your Web Forms code is getting a bit unruly or spaghetti-like then MVC could address and fix some of your maintenance issues by breaking out components into manageable units, or concerns.

Controllers of course make the calls to Web services to retrieve JSON or XML data or directly to the database, a repository, or any number of options. Controllers also do the work of determining how HTTP requests are handled. This responsibility falls to the code behind in Web Forms.

ASP.NET Core:

Since it’s all ASP.NET, you get to share core features such as sessions, caching, globalization, Forms authentication between Web Forms and MVC.

Summary

Fortunately assets like images, CSS, and custom JavaScript are all reusable between Web Forms and MVC projects. Just keep the ID and NAME attributes the same (which you want anyway for consistency). As you can see, both technologies are ASP.NET so they can live harmoniously and even compliment each other.

As you can see, with just a few modifications to a Web Forms project and you can start adding MVC components. You can run both Web Forms and MVC or work toward doing a complete migration.